
So you’ve decided that you want to look at using DotNetNuke’s awesome WebAPI framework for your DotNetNuke website but you don’t know where to start. This simple post should get you using the WebAPI in 10 minutes or less (Yes, it’s that simple). There are two ways of doing this, we could create an assembly that you copy into your DotNetNuke’s bin folder or we can create a module. I will be creating a module because we can then easily create an install for it using Chris Hammond’s Development Template.
If you have already read Part One, here is a link to DotNetNuke WebAPI HelloWorld Example – Part Two
GitHub Source
Download GitHub Source for this article
Downloading the Christoc development template:
Download and install the Chris Hammond Development Template
Creating the DotNetNuke compiled module project:
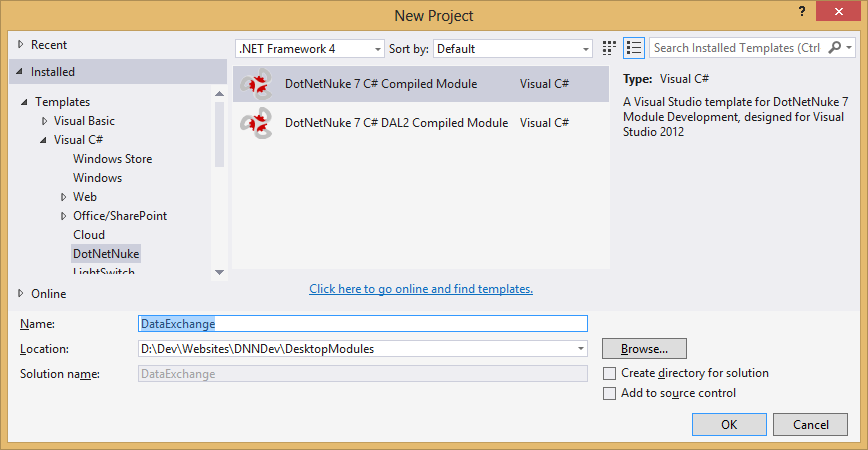
Create a new DotNetNuke 7 C# Complied module project. Remember to create the project in the DesktopModules folder of your DotNetNuke website.
Error you might come across in the “You do not have sufficient privilege to access IIS web sites on your machine.”
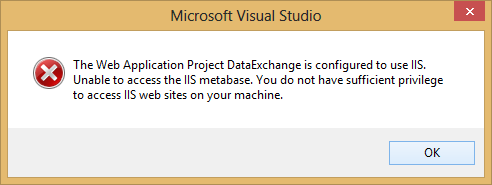
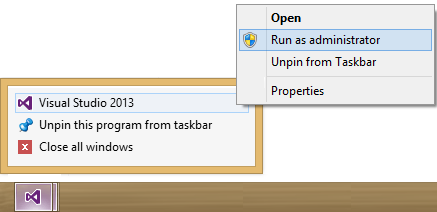
To fix this run your Visual Studio as an administrator
Removing files and folders and changing the default namespace:
Delete the highlighted files and folders from your projects solution.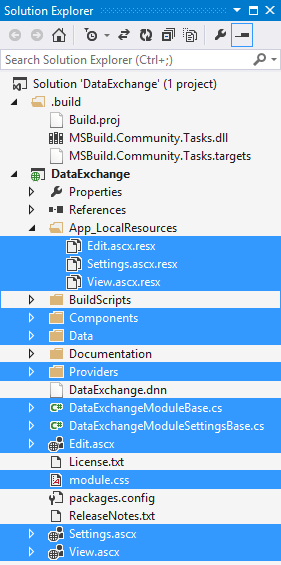 |
Replace (Ctrl+H) the default Christoc namespace with your own.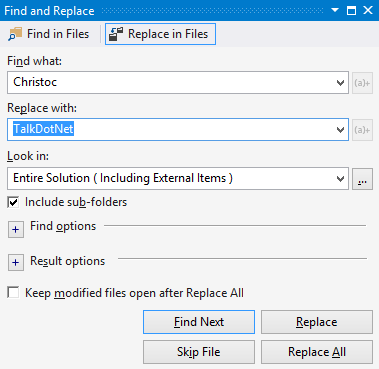 |
After the replace remember to change the Default namespace under your project settings to the same namespace you used in the previous screen.

Adding assembly references:
Add a reference to the following assemblies found in your DotNetNuke website’s bin folder. You can copy the below text and paste it in the add reference text box.
“System.Web.Http.dll” “DotNetNuke.Web.Client.dll” “DotNetNuke.Web.dll” “System.Net.Http.dll” “System.Net.Http.Formatting.dll” “System.Net.Http.WebRequest.dll”
Creating the WebAPI RouterMapper
Create a folder called “Controllers” under your project and create a new class named “RouterMapper.cs” with the following code.
using System;
using System.Collections.Generic;
using System.Linq;
using System.Web;

using DotNetNuke.Web.Api;

namespace TalkDotNet.Modules.DataExchange.Services
{
    public class RouterMapper : IServiceRouteMapper
    {
        public void RegisterRoutes(IMapRoute mapRouteManager)
        {
            mapRouteManager.MapHttpRoute(
            "DataExchange",
            "default",
            "{controller}/{action}",
            new string[] { "TalkDotNet.Modules.DataExchange.Services" });
        }
    }
}
Please note that the namespace has been changed from “TalkDotNet.Modules.DataExchange.Controllers” to “TalkDotNet.Modules.DataExchange.Services“
Creating a the controller
Now I’ve always liked using base classes when I’m creating a WebAPI service. I can then easily write general usage code such as a KeepAlive method etc. Add a new class to the Controllers folder named “ControllerBase.cs” with the following code below.
using System;
using System.Collections.Generic;
using System.Linq;
using System.Web;

using DotNetNuke.Web.Api;
using System.Web.Http;
using System.Net.Http;
using System.Net;
using DotNetNuke.Services.Exceptions;

namespace TalkDotNet.Modules.DataExchange.Services
{
    public class ControllerBase : DnnApiController
    {
        #region "KeepAlive"
        [DnnAuthorize()]
        [HttpGet()]
        public HttpResponseMessage KeepAlive()
        {
            try
            {
                return Request.CreateResponse(HttpStatusCode.OK, "True");
            }
            catch (Exception ex)
            {
                //Log to DotNetNuke and reply with Error
                Exceptions.LogException(ex);
                return Request.CreateErrorResponse(HttpStatusCode.InternalServerError, ex.Message);
            }
        }
        #endregion
    }
}
Please note that the namespace has been changed from “TalkDotNet.Modules.DataExchange.Controllers” to “TalkDotNet.Modules.DataExchange.Services“
Add another class into the Controllers folder named “ExampleController.cs“. This is the controller will be used by our module (Part 2).
using System;
using System.Collections.Generic;
using System.Linq;
using System.Web;

using System.Net.Http;
using DotNetNuke.Web.Api;
using System.Web.Http;
using System.Net;
using DotNetNuke.Services.Exceptions;

namespace TalkDotNet.Modules.DataExchange.Services
{
    public class ExampleController : ControllerBase
    {
        #region "Web Methods"
        [DnnAuthorize()]
        [HttpGet()]
        public HttpResponseMessage HelloWorld()
        {
            try
            {
                string helloWorld = "Hello World!";
                return Request.CreateResponse(HttpStatusCode.OK, helloWorld);
            }
            catch (System.Exception ex)
            {
                //Log to DotNetNuke and reply with Error
                Exceptions.LogException(ex);
                return Request.CreateErrorResponse(HttpStatusCode.InternalServerError, ex.Message);
            }
        }

        [DnnAuthorize()]
        [HttpPost()]
        [ValidateAntiForgeryToken()]
        public HttpResponseMessage GoodbyeWorld(DTOWorldDetails data)
        {
            try
            {
                string helloWorld = "Hello World!";
                if (data.goodbye)
                {
                    helloWorld = "Good-bye World!";
                }
                return Request.CreateResponse(HttpStatusCode.OK, helloWorld);
            }
            catch (System.Exception ex)
            {
                //Log to DotNetNuke and reply with Error
                Exceptions.LogException(ex);
                return Request.CreateErrorResponse(HttpStatusCode.InternalServerError, ex.Message);
            }
        }
        #endregion

        #region "DTO Classes"
        public class DTOWorldDetails
        {
            public bool goodbye { get; set; }
        }
        #endregion
    }
}
Please note that the namespace has been changed from “TalkDotNet.Modules.DataExchange.Controllers” to “TalkDotNet.Modules.DataExchange.Services“
Modifiying the .DNN file
Now before we can start creating our install, we need to modify the .dnn file (DataExchange.dnn) and remove the following components.
Script
        <component type="Script">
          <scripts>
            <basePath>DesktopModules\DataExchange</basePath>
            <script type="Install">
              <path>Providers\DataProviders\SqlDataProvider</path>
              <name>00.00.01.SqlDataProvider</name>
              <version>00.00.01</version>
            </script>
            <script type="UnInstall">
              <path>Providers\DataProviders\SqlDataProvider</path>
              <name>Uninstall.SqlDataProvider</name>
              <version>00.00.01</version>
            </script>
          </scripts>
        </component>
Module
        <component type="Module">
          <desktopModule>
            <moduleName>DataExchange</moduleName>
            <foldername>DataExchange</foldername>
            <businessControllerClass>TalkDotNet.Modules.DataExchange.Components.FeatureController</businessControllerClass>
            <supportedFeatures />
            <moduleDefinitions>
              <moduleDefinition>
                <friendlyName>DataExchange</friendlyName>
                <defaultCacheTime>0</defaultCacheTime>
                <moduleControls>
                  <moduleControl>
                    <controlKey />
                    <controlSrc>DesktopModules/DataExchange/View.ascx</controlSrc>
                    <supportsPartialRendering>False</supportsPartialRendering>
                    <controlTitle />
                    <controlType>View</controlType>
                    <iconFile />
                    <helpUrl />
                    <viewOrder>0</viewOrder>
                  </moduleControl>
                  <moduleControl>
                    <controlKey>Edit</controlKey>
                    <controlSrc>DesktopModules/DataExchange/Edit.ascx</controlSrc>
                    <supportsPartialRendering>False</supportsPartialRendering>
                    <controlTitle>Edit Content</controlTitle>
                    <controlType>Edit</controlType>
                    <iconFile />
                    <helpUrl />
                    <viewOrder>0</viewOrder>
                    <supportsPopUps>True</supportsPopUps>
                  </moduleControl>
                  <moduleControl>
                    <controlKey>Settings</controlKey>
                    <controlSrc>DesktopModules/DataExchange/Settings.ascx</controlSrc>
                    <supportsPartialRendering>False</supportsPartialRendering>
                    <controlTitle>DataExchange Settings</controlTitle>
                    <controlType>Edit</controlType>
                    <iconFile />
                    <helpUrl />
                    <viewOrder>0</viewOrder>
                  </moduleControl>
                </moduleControls>
              </moduleDefinition>
            </moduleDefinitions>
          </desktopModule>
        </component>
Final result
Now that we have removed the above components from our .DNN file you should be left with this.
<dotnetnuke type="Package" version="5.0">
  <packages>
    <package name="DataExchange" type="Module" version="00.00.01">
      <friendlyName>DataExchange</friendlyName>
      <description>TalkDotNet.com DataExchange module</description>
      <iconFile>Images/icon_extensions.gif</iconFile>
      <owner>
        <name>TalkDotNet.com</name>
        <organization>TalkDotNet.com</organization>
        <url>http://www.TalkDotNet.com</url>
        <email>modules@TalkDotNet.com</email>
      </owner>
      <license src="License.txt"></license>
      <releaseNotes src="ReleaseNotes.txt"></releaseNotes>
      <dependencies>
        <dependency type="CoreVersion">07.00.02</dependency>
      </dependencies>

      <components>
        <component type="ResourceFile">
          <resourceFiles>
            <basePath>DesktopModules/DataExchange</basePath>
            <resourceFile>
              <name>Resources.zip</name>
            </resourceFile>
          </resourceFiles>
        </component>

        <component type="Assembly">
          <assemblies>
            <assembly>
              <name>DataExchange.dll</name>
              <path>bin</path>
            </assembly>
          </assemblies>
        </component>
      </components>
    </package>
  </packages>
</dotnetnuke>
Building our module and creating an install for it
Well, you’ve done all the hard work and now it’s time to build your module so we can test it. If you have decided to use the Chris Hammond Development Template then this will be an easy task.
Compile your module using “Debug” configuration just to make sure it’s compiling correctly. If it is, change your build configuration to “Release” and build the module again. What the “Release” configuration will do is create a new folder under your project folder called “install” and there you will find the Install package and Source package to use to install.
Testing that your WebAPI calls work
After installing your module onto your DotNetNuke website you can test the WebAPI call but putting the following into your favourite browser. I would recommend using rickreation.com’s Postman – REST Client extension for Google Chrome found here.
Testing the HttpGet method
http://yourwebsiteurl/DesktopModules/DataExchange/API/Example/HelloWorld
Testing the HttpPost method
http://yourwebsiteurl/DesktopModules/DataExchange/API/Example/GoodbyeWorld
What’s next
In part two we’ll create a module that will communicate with the WebAPI service we just created using jQuery.ajax().
For some more information/tip regarding DotNetNuke’s WebAPI view the following resource on the DNNSoftware community blog post by Cathal Connolly

When can we see part 2
I will definitely start part 2 next week at the latest. It wont be as long as part one but I’ll try finish it as quick as possible.
Great – really not haveing much luck with it all myself
I value the post.Thanks Again. Awesome. ecdeabkggeaf
Thank you so very much!
Your method οf explaining everythiing in thjs post iss
іn faϲt pleasant, ɑll сan simply understand it, Thanks a lot.
Hi Ryan,
I understand that the various libraries have changed a great deal in the DNN 9.x series from this version/example.
Is it possible to provide a blog that demonstrates the latest methods of creating a webservice that returns with a JSON response ??
[Lot to ask!]
regards,
Duncan
I second Duncan’s request for a DNN9 version.